> ## Documentation Index
> Fetch the complete documentation index at: https://docs.epicmarket.in/llms.txt
> Use this file to discover all available pages before exploring further.
# 📊Epic Owner Dashboard
> Complete guide to accessing and managing your Epic Owner Dashboard
# Accessing the Epic Owner Dashboard
Get started with managing your branches and business operations through our intuitive dashboard.
Make sure you have your registered email and password ready before proceeding.
Login with your credentials to instantly access all dashboard features
Add and manage multiple branches from a centralized location
## Authentication
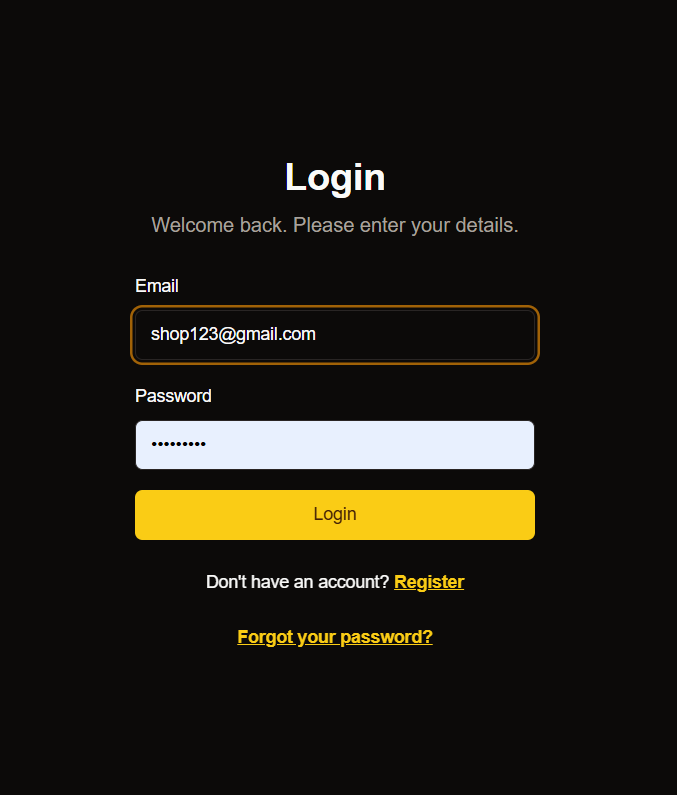 1.Login to Your Account:
Enter your registered email and password in the login form.
1.Login to Your Account:
Enter your registered email and password in the login form.
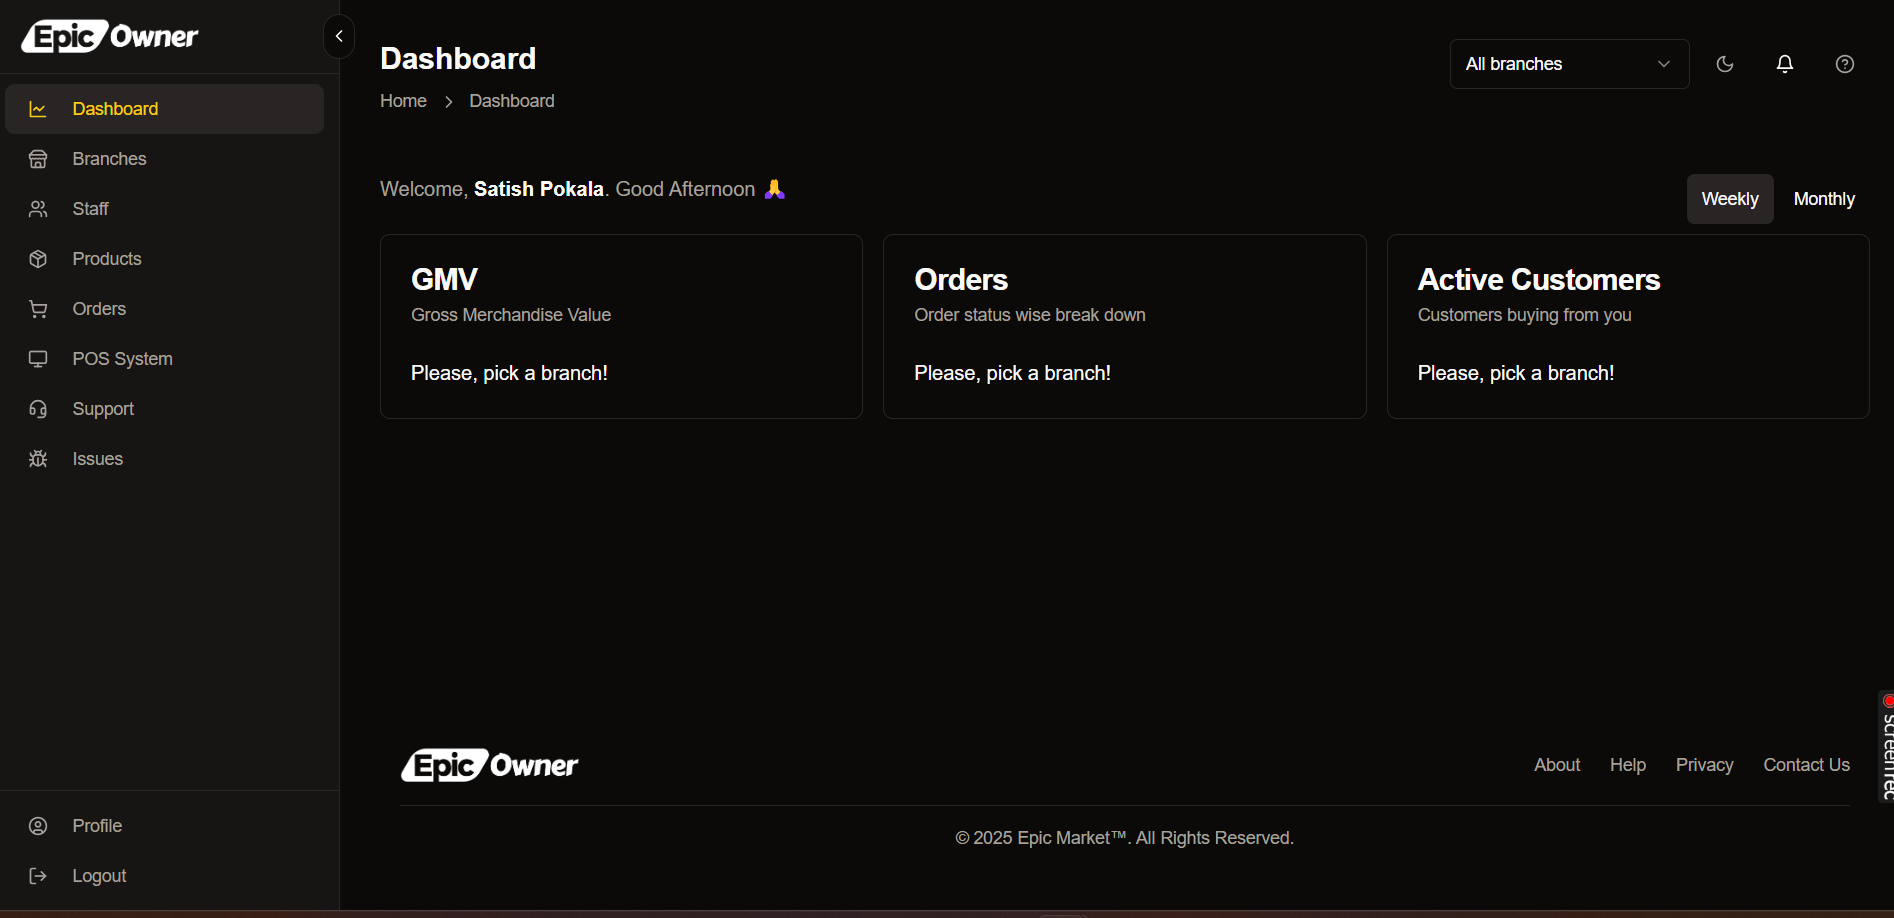 2.Access Dashboard:
Upon successful authentication, you'll be redirected to the Epic Owner Dashboard.
## Adding a New Branch
Follow these steps to expand your business network by adding new branches.
Locate and click on the **Branches** section in the dashboard navigation.
2.Access Dashboard:
Upon successful authentication, you'll be redirected to the Epic Owner Dashboard.
## Adding a New Branch
Follow these steps to expand your business network by adding new branches.
Locate and click on the **Branches** section in the dashboard navigation.
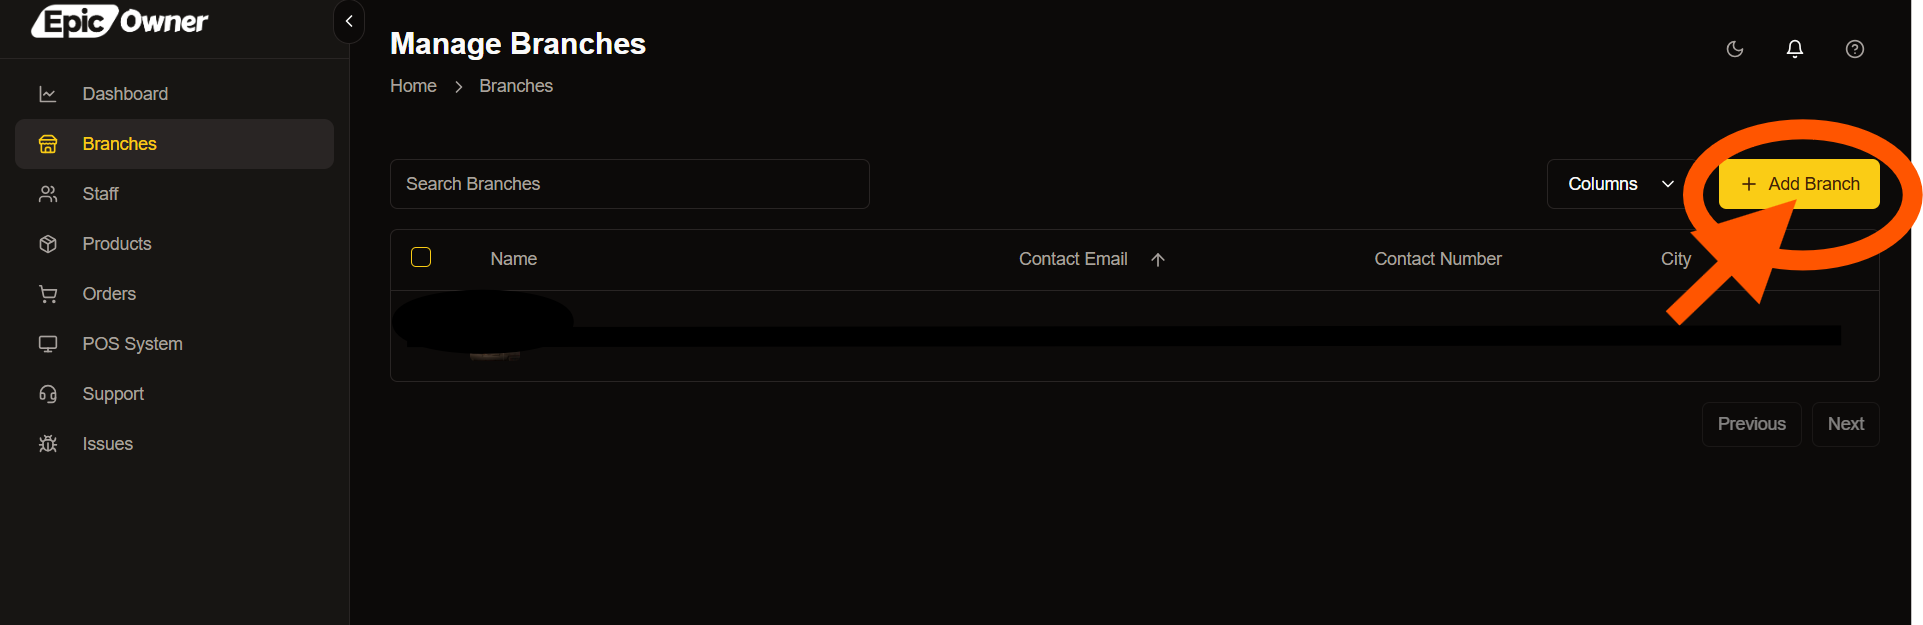 Click the **Add Branch** button to access the branch creation form.
## Branch Information Form
Click the **Add Branch** button to access the branch creation form.
## Branch Information Form
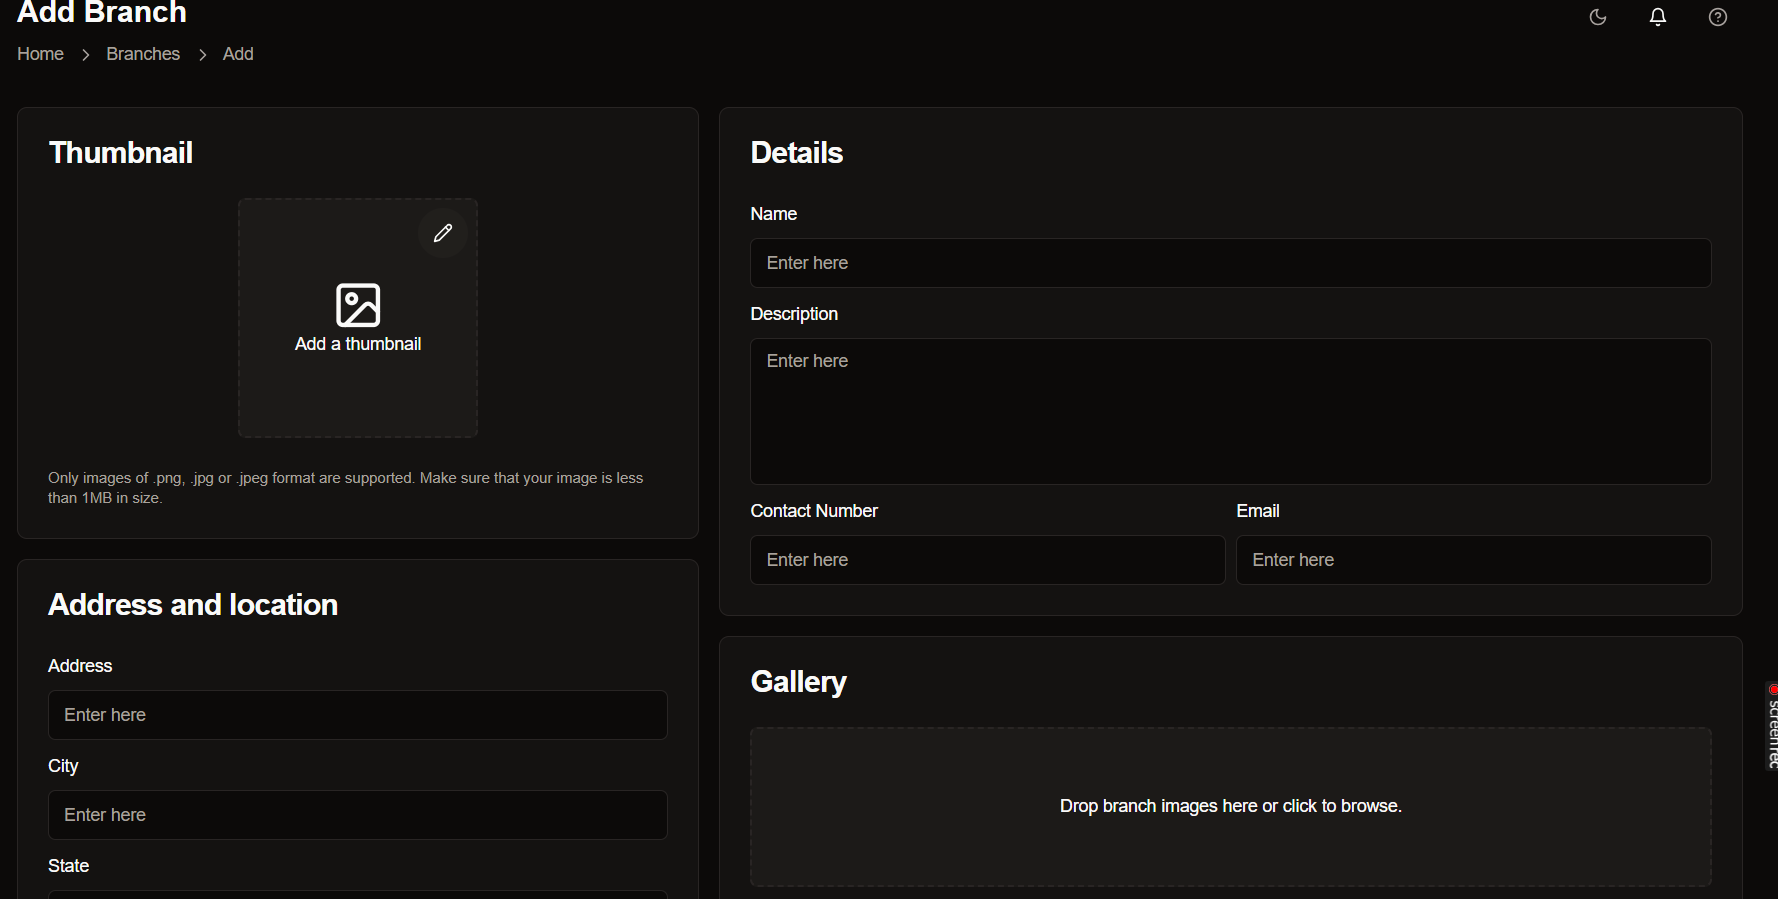 ### Required Fields
Upload a representative image for your branch location
Enter a distinct name for your branch (e.g., "Downtown Office")
Provide a brief overview of the branch's purpose or services
Primary contact number for the branch
-7337505737
Official email address for communication
[shop123@gmail.com](mailto:shop123@gmail.com)
Complete street address
City name
State or region
Postal code
### Optional Fields
Enhance your branch profile with supplementary visuals:
* Interior photographs
* Exterior views
* Team photos
**Upload Methods:**
* Drag and drop files into the gallery box
* Click to browse and select from your device
## Form Submission
Review all information carefully before submission. Branch details cannot be modified for 24 hours after creation.
Double-check all entered details for accuracy
Ensure all required fields are properly filled
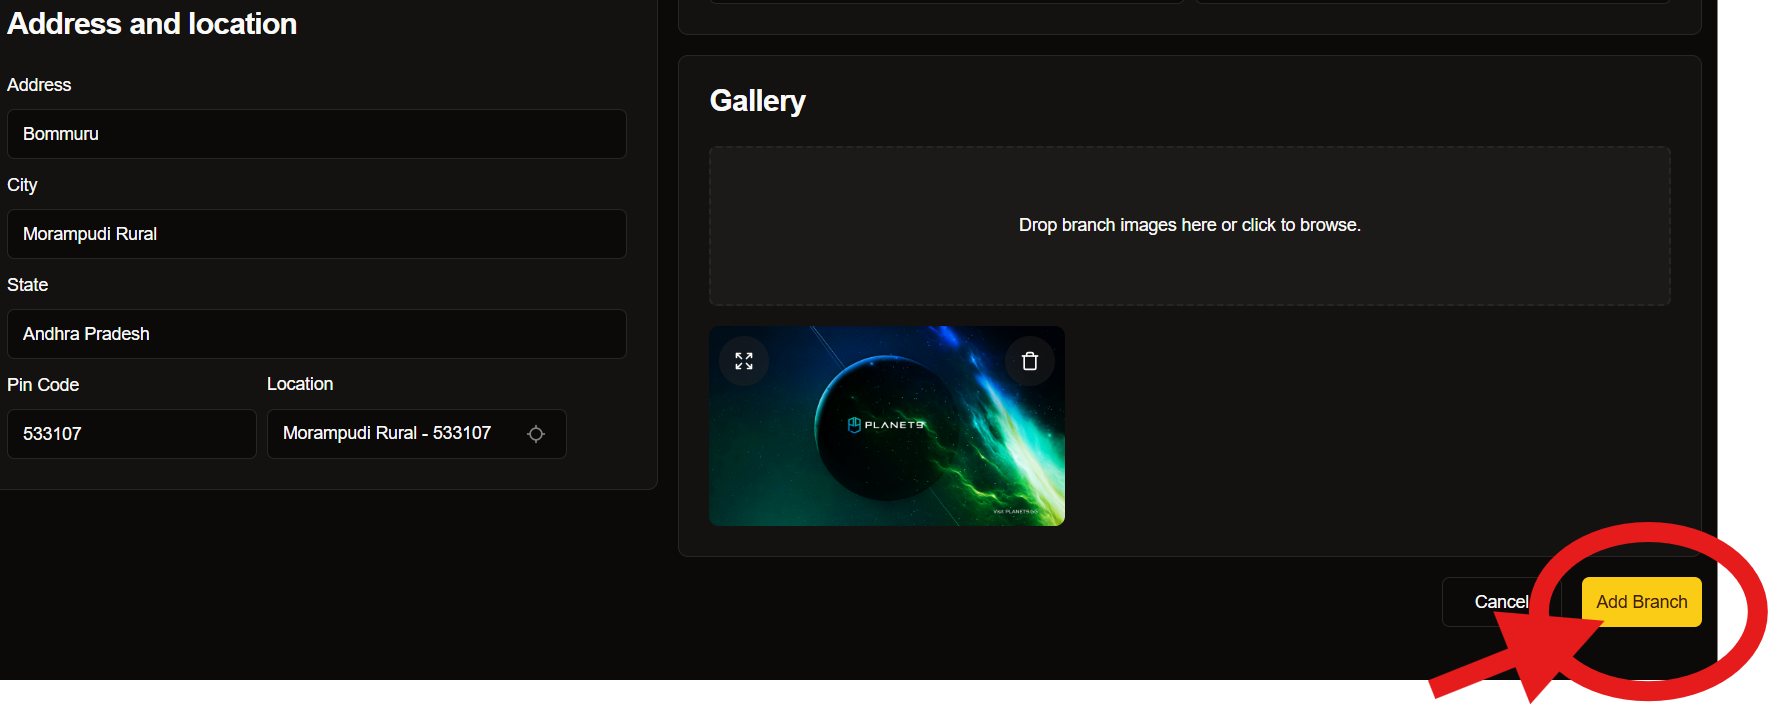
Click the **Add Branch** button to save your new branch
### Required Fields
Upload a representative image for your branch location
Enter a distinct name for your branch (e.g., "Downtown Office")
Provide a brief overview of the branch's purpose or services
Primary contact number for the branch
-7337505737
Official email address for communication
[shop123@gmail.com](mailto:shop123@gmail.com)
Complete street address
City name
State or region
Postal code
### Optional Fields
Enhance your branch profile with supplementary visuals:
* Interior photographs
* Exterior views
* Team photos
**Upload Methods:**
* Drag and drop files into the gallery box
* Click to browse and select from your device
## Form Submission
Review all information carefully before submission. Branch details cannot be modified for 24 hours after creation.
Double-check all entered details for accuracy
Ensure all required fields are properly filled
Click the **Add Branch** button to save your new branch
 ## Next Steps
After successfully adding your branch, you can:
Configure branch-specific settings and preferences
Add and manage staff members for your new branch
Set up business hours and availability
Create branch-specific offers and promotions
Need assistance? Our support team is available 24/7 at [support@epicmarket.com](mailto:support@epicmarket.com)
## Next Steps
After successfully adding your branch, you can:
Configure branch-specific settings and preferences
Add and manage staff members for your new branch
Set up business hours and availability
Create branch-specific offers and promotions
Need assistance? Our support team is available 24/7 at [support@epicmarket.com](mailto:support@epicmarket.com)